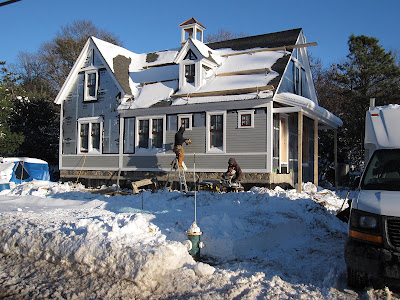
Saturday night over a foot of snow fell on Cape Cod. They bore the brunt of the storm and, for a change, northern New England received less snow than the Cape.
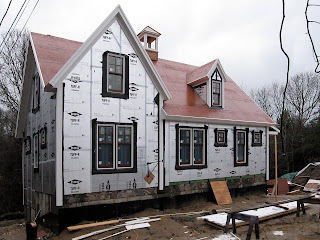
The siding installation started today. We're happy with our custom color. I was worried it might look too much like primer, but it has a nice 'warm grey but not quite tan' color.
It may seem like a small thing, but the Azek trim is 5/4, which means it's 1" thick rather than the typical 3/4" thickness. 5/4 used to be the rough cut dimension before drying and planing, but that's a little outdated now that the trim is cellular PVC rather than wood. If you look at the enlarged photo, you can see there's a nice shadow line because the trim is about 1/4" thicker than the siding. I don't know if others will notice, but I do.
Things look a little better each time we see the place. I'm looking forward to seeing the installation of the cupola windows and weathervane, but for the moment we need to concentrate on the siding.
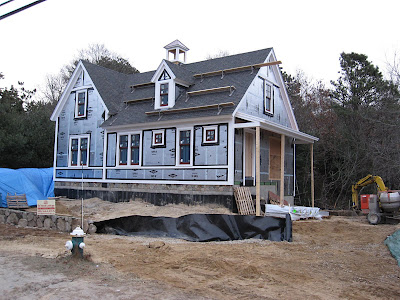
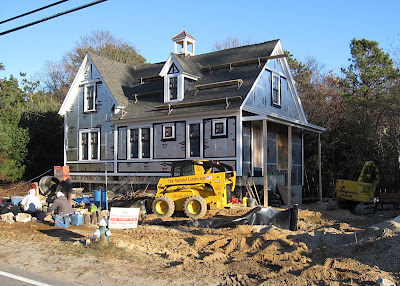
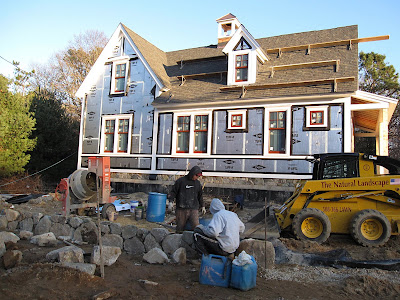
The photo below showns what things looked like just before the storm. The stone wall is in place, ready for the septic system installation. The newest part of the wall is under the blue tarp. Once the septic is in place, the remainder of the stone wall can be installed.
Tuesday, December 22, 2009
Thursday, December 17, 2009
Weathertight
I didn't know if it should be Weathertight or Weather Tight but, according to Daniel Webster, either is correct. We've had some significant rains the past few weeks and, even though the roof sheathing is on, much water came in. Now that we're weathertight, things can dry out.
The shingles look good. They are Certainteed Independence shingles, which are one of my favorites. They have some black strips and added layering which gives them a kind of a textured wood look. They have a lifetime warranty, for what it's worth. In the fine print it states that after the 40th year, the maximum payout is 20% of the maximum liability, but I find it worthwhile to pay more for a better, more attractive shingle. Unfortunately no one in New England stocks them any more. Shepley was able to get them in short order, but there is a restocking fee if I ordered too many and a short wait if I need more. Part of the back roof is not shingled and we'll be close but don't know yet if we have the right amount.
The large plywood panel is where the sliding glass door will go. In New England it's called "the slidah". It came in with a white frame, but the door and the grilles were different colors. With Eagle you can get the window frames one color, the sashes a different color and the grilles yet another color at no additional charge. They've remade the door panels and the corrected door is at the lumber yard.
The stone wall at the raised septic system is going in now.
Per previous posts, I never expected this work to have to wait until December. We've had a warm fall and pre-winter and now, just in time for masonry work, the temperatures have fallen. They cover it at the end of the day and provide heat at night. They will finish enough of it this week to enable the septic system installation, but that's Christmas week which means it may or may not start next week.
Saturday, December 12, 2009
Road Trip
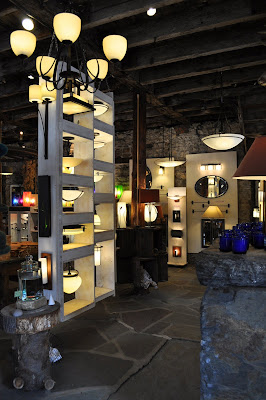
Yesterday we went to Castleton, Vermont to see lights being made at Hubbardton Forge.
We're looking for light fixtures which are kind of Arts and Crafts style, but not in the most literal sense - something kind of contemporary but with classic lines and forms. They have some designs which are not quite like anything else we've found, and it's nice that they're actually made at their factory in Vermont. They don't often provide factory tours and we were fortunate to have had the opportunity. Here's a video showing how they're made.
Afterwards we stopped at the Handmade in Vermont store, which has a comprehensive display of Hubbardton Forge lights.
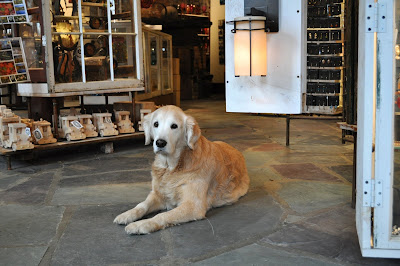
They have a very liberal return policy, and the lights they receive back are sold in the store only, not online, for a fraction of list price. We picked up three light fixtures for about what one fixture would have cost. This is their helper named Industry.
It's kind of interesting that one of the lights we bought has been to Anchorage and back.
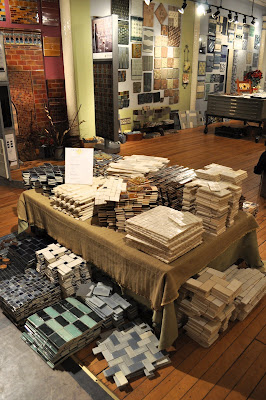
On the way back we stopped at Trikeenan Tileworks in Keene, New Hampshire. They make beautiful handmade tile and they have seconds available at their factory store.
We picked up some tile for the upstairs Bathroom. Since the tile is handmade, some of the imperfections seem like part of the natural variation. I doubt that the guests will notice that they're getting seconds - unless they read this blog.
Sunday, December 6, 2009
Windows at Last
The roof sheathing, fascias and much of the trim is in and, in the last couple of days, the windows were installed. They've been hanging out at Shepley's for almost four weeks and it's good to finally have them in place.
The shiny stuff on the outside of the house is Dow Tuff-R insulating sheathing. It provides an additional R-5 of continuous insulation, which has the advantage of not being compromised by thermal bridging from the wood studs and headers. It's kind of an additional insulating blanket around the whole house. Here's a Guide to Insulating Sheathing from Building Science Corportation and a guide to Rigid Foam Insulation from Green Building Advisor.
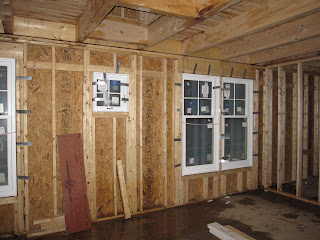
These are the windows in the Living Room. The mondo metal straps are to hold the impact windows in place. They look kind of appropriate for the big double hung windows, but seem like overkill for the little awning windows.
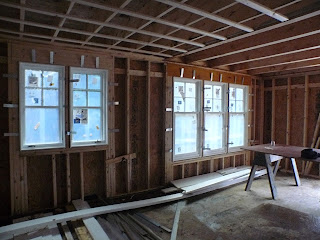
This is a view of the windows in the Kitchen and Dining Room. The Kitchen windows are casement windows with simulated divided lights which make them look similar to the other double hung windows. Notice how that, when the windows get smaller, the window proportions stay the same. Many new houses have haphazard window patterns which can sometimes look rather odd.
The inside of the house was a little wet. Next week we should be water tight.
Tuesday, November 24, 2009
Details
I drove by the Hyannis Visitor Center and stopped to take a photo. It's an interesting design and has some features worth noticing. It was hard to get a good view because of the power poles and wiring which are just barely cropped out.
I used the Paint Shop Pro perspective correction tool to correct the vertical convergence in the original of this photo. After dragging a rectangle over the lines which should be vertical or horizontal, one click makes things parallel again. It's almost like cheating. The Visitor Center has half-round gutters and round downspouts, similar to what we will be using. In my opinion they look much better, although they are not so common and are harder to find. The round downspout elbows look much nicer than the crinkled rectangular aluminum ones too. The porch roof will also be metal and I was looking for someone who could install both in the same color. The gutters often come from one manufacturer and the metal roof from another. When searching for contractors I found Fall River Seamless Gutter. They extrude seamless half-round gutters and make a snap-lock standing seam roof panel. The roofer who installs the shingles can install the metal roof and the roof will match the gutters, although we haven't decided yet if these will be painted metal or copper.
The Visitor Center also has fibercement shingle siding in the upper gables. This is probably the HardieShingle siding. I had also considered a moulded urethane product by Chemcrest. The Chemcrest shingles are moulded very realistically, but their sizes would result in a fair amount of waste and would be relatively expensive. I had also considered real wood shingles but wanted something easy to care for especially in the upper reaches. Again I decided on a Certainteed product.
Their shingles have a 5" exposure, which is appropriate for the space available and they have a realistic woodgrain. Although I don't have long runs of shingles, Certainteed has an interesting system. They actually have three different shingle panels and a system to keep them random looking. So much for the modernist principle of form follows function. Instead it's more like form follows tradition.
The base of the Visitor Center also has a nice light grey-beige kind of color. We haul our custom color siding samples around and I compared them to this color. It's kind of interesting that they are a close match.
And here's our custom turtle from Acadia Weathervanes.

Finally, here are a few construction photos. Eric Hakala and the guys from Pires Construction are doing a nice job on the trim. Here's an eave detail which has worked out well. I had carefully planned this so that the 12/12 pitch rake board will meet the corner of the 15/12 fascia from the front gable. I can plan things out and provide details to try to make things come out just right, but rely on the skill of others to make it so. I pre-planned the framing details and showed a perspective view to Eric and mentioned that, because of the different pitches, the trim construction sequence would be 1) install the 12/12 fascia, 2) install the 15/12 fascia, 3) install the 12/12 fascia trim and then 4) install the 15/12 fascia trim. Others may not notice because it's on the side of the house, but I'll know. So many buildings have odd details because things weren't properly planned.
And here are a couple of photos of the house with the cupola in place. The cupola windows will go in later.
It's hard to get good angles with all the equipment and materials. There's not much extra room on site.

I used the Paint Shop Pro perspective correction tool to correct the vertical convergence in the original of this photo. After dragging a rectangle over the lines which should be vertical or horizontal, one click makes things parallel again. It's almost like cheating. The Visitor Center has half-round gutters and round downspouts, similar to what we will be using. In my opinion they look much better, although they are not so common and are harder to find. The round downspout elbows look much nicer than the crinkled rectangular aluminum ones too. The porch roof will also be metal and I was looking for someone who could install both in the same color. The gutters often come from one manufacturer and the metal roof from another. When searching for contractors I found Fall River Seamless Gutter. They extrude seamless half-round gutters and make a snap-lock standing seam roof panel. The roofer who installs the shingles can install the metal roof and the roof will match the gutters, although we haven't decided yet if these will be painted metal or copper.
The Visitor Center also has fibercement shingle siding in the upper gables. This is probably the HardieShingle siding. I had also considered a moulded urethane product by Chemcrest. The Chemcrest shingles are moulded very realistically, but their sizes would result in a fair amount of waste and would be relatively expensive. I had also considered real wood shingles but wanted something easy to care for especially in the upper reaches. Again I decided on a Certainteed product.
Their shingles have a 5" exposure, which is appropriate for the space available and they have a realistic woodgrain. Although I don't have long runs of shingles, Certainteed has an interesting system. They actually have three different shingle panels and a system to keep them random looking. So much for the modernist principle of form follows function. Instead it's more like form follows tradition.
The base of the Visitor Center also has a nice light grey-beige kind of color. We haul our custom color siding samples around and I compared them to this color. It's kind of interesting that they are a close match.

Finally, here are a few construction photos. Eric Hakala and the guys from Pires Construction are doing a nice job on the trim. Here's an eave detail which has worked out well. I had carefully planned this so that the 12/12 pitch rake board will meet the corner of the 15/12 fascia from the front gable. I can plan things out and provide details to try to make things come out just right, but rely on the skill of others to make it so. I pre-planned the framing details and showed a perspective view to Eric and mentioned that, because of the different pitches, the trim construction sequence would be 1) install the 12/12 fascia, 2) install the 15/12 fascia, 3) install the 12/12 fascia trim and then 4) install the 15/12 fascia trim. Others may not notice because it's on the side of the house, but I'll know. So many buildings have odd details because things weren't properly planned.
And here are a couple of photos of the house with the cupola in place. The cupola windows will go in later.

It's hard to get good angles with all the equipment and materials. There's not much extra room on site.
Thursday, November 19, 2009
Cooking with Gas - or Maybe Not
We've assumed from the start that we'd have either a gas cooktop or range. It's so much quicker than electric and the flame is so visceral. When we started looking at appliances, we couldn't help but to fall for a big 48" commercial style range with the double oven like this Wolf range.
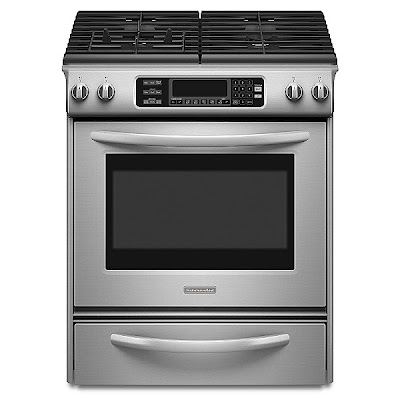
It has high capacity burners, multiple options for the cooking surface, and just looks so cool. When considering how we want to spend our money though, a slide in range like this seems to make more sense.
It's much cheaper and still gets the job done. It's a single oven, but the lower compartment is a warming drawer. The slide-in ranges are much better looking than the freestanding style, but you do have to worry about the controls on the front surface.
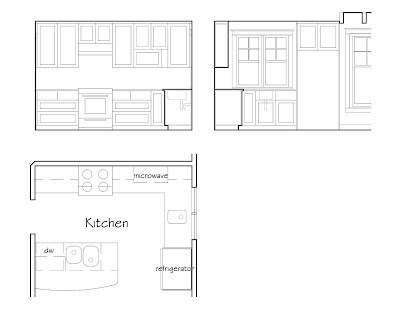
Here's what the Kitchen would look like.
Rather than having the microwave over the range, this shows a real exhaust hood and an over-the-range style microwave in cabinets custom sized to just the right height so the bottom of the microwave is exactly flush with the bottom of the cabinets.
My wife really would like to have a wall oven or preferably a double oven and a cooktop, which is neater and cleaner than a range. Wall ovens and a cooktop cost more than a range, and the sizes aren't so standardized. Once you have built-in ovens, their future replacements have to fit in the holes initially provided or the cabinets have to be modified. So I started shopping again.
Two wall ovens and a microwave make for a tall stack of appliances and the microwave would we a little high - and the microwave gets so much more use than ovens do. We considered something like this KitchenAid oven/microwave combo, and we could put a warming drawer below it. The funny thing is, a single oven and a warming drawer cost about as much as a double oven. The warming drawer is such a simple appliance but they charge what the market will bear.

I saw some Miele ovens which look fantastic, but the price is a little high. We like the clean euro style, but not so much the euro style price.
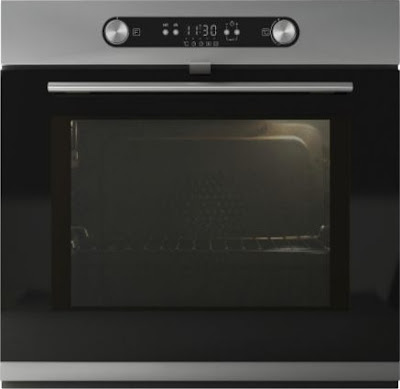
Then we went back to IKEA. Their selection is limited, but they do have the euro style thing down because they're from Europe. You can get a Nutid (you have to love their product names)oven
which matches the Nutid microwave

It has high capacity burners, multiple options for the cooking surface, and just looks so cool. When considering how we want to spend our money though, a slide in range like this seems to make more sense.
It's much cheaper and still gets the job done. It's a single oven, but the lower compartment is a warming drawer. The slide-in ranges are much better looking than the freestanding style, but you do have to worry about the controls on the front surface.
Here's what the Kitchen would look like.
Rather than having the microwave over the range, this shows a real exhaust hood and an over-the-range style microwave in cabinets custom sized to just the right height so the bottom of the microwave is exactly flush with the bottom of the cabinets.
My wife really would like to have a wall oven or preferably a double oven and a cooktop, which is neater and cleaner than a range. Wall ovens and a cooktop cost more than a range, and the sizes aren't so standardized. Once you have built-in ovens, their future replacements have to fit in the holes initially provided or the cabinets have to be modified. So I started shopping again.
Two wall ovens and a microwave make for a tall stack of appliances and the microwave would we a little high - and the microwave gets so much more use than ovens do. We considered something like this KitchenAid oven/microwave combo, and we could put a warming drawer below it. The funny thing is, a single oven and a warming drawer cost about as much as a double oven. The warming drawer is such a simple appliance but they charge what the market will bear.

I saw some Miele ovens which look fantastic, but the price is a little high. We like the clean euro style, but not so much the euro style price.
Then we went back to IKEA. Their selection is limited, but they do have the euro style thing down because they're from Europe. You can get a Nutid (you have to love their product names)oven
which matches the Nutid microwave

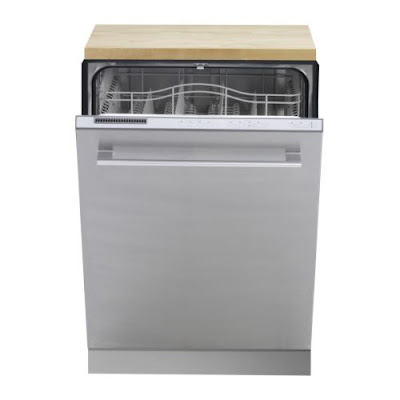
and has the same style and pulls as the Nutid dishwasher
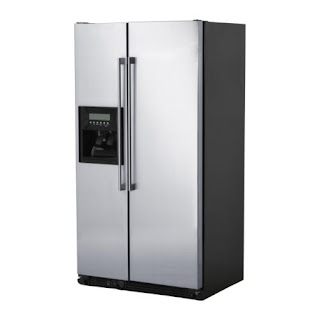
and the Nutid counter-depth refrigerator.
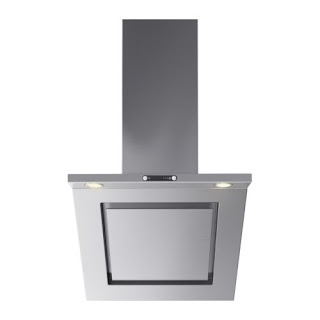
I'm not yet used to the looks of the Nutid exhaust hood
but the shape makes sense. The upper control is just above head height and the surface slopes down so that the exhaust is closer to the cooking surface.
Now for the cooking with gas part. The latest Consumer Reports appliance review got me thinking about electric induction cooking. It's even quicker than gas and has amazing controlability. Here's a video demo. I think we're convinced that this is the way to go.
Unfortunately IKEA doesn't have induction cooktops in the US yet. Their appliances have the style we're looking for, have most of the features we're looking for and even a few we didn't expect, they're made by Whirlpool, have a standard five year warranty and the pricing is hard to beat.
Thursday, November 12, 2009
It's Starting to Look Like a House
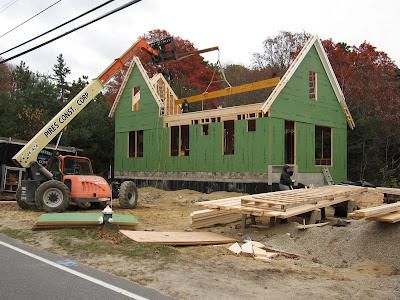
The floor beams are in and the gables are up. Although ridge boards in the past were typically 2x12's, maybe 16' or 20' long, the ridge board being lifted is a one-piece 40' long LVL (laminated veneer lumber) board. It's not necessary structurally to have a continuous LVL ridge, but does insure that the ridge will be solid and straight, and it's 14" tall so the cut ends of the rafters aren't taller than the ridge board.
This is the beamed ceiling in the Livng Room. The small square in the middle will be opened up and the dormer is directly overhead, providing light in both the Living Room and the Loft above.
Here's the view to the front.
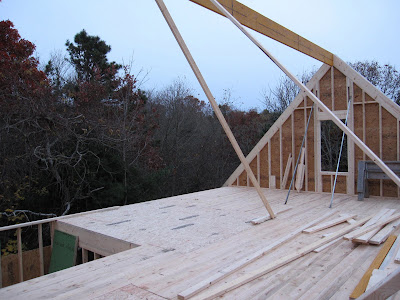
And this is the view out the back of the house. The ocean is out there somewhere beyond the trees. The roof deck probably isn't high enough to see the ocean even after the leaves drop, but there's always hope.
Sunday, November 8, 2009
Progress!
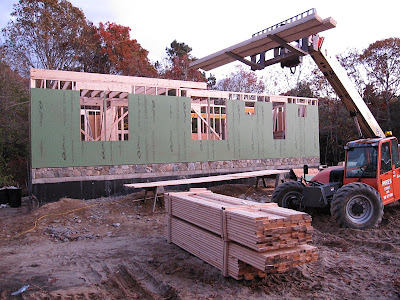
Wednesday morning things started again. The first floor walls went up and then Friday the hemlock beams and deck were delivered.
The green sheathing is called Huber Zip System. It should provide a better air barrier than typical house wraps and better moisture resistance too. The surface and core of the sheathing are both water resistant and the seams receive a high performance tape to seal the joints. Typical air and moisture barriers like asphalt felt paper or Tyvek type wraps rely on proper installation for effective protection, and plywood wall sheathing is susceptible to water damage. I always worry about new products and often rely on the tried and true, even if there are concerns. At least they're typically known concerns. The Zip System seems to have been thoroughly tested and an improvement over plywood and housewrap or felt.
The photo above shows the 2x6 tongue and groove hemlock floor decking.
And this is a view looking through the Living Room area towards the Master Bathroom and Closet.
The photo above shows the 2x6 tongue and groove hemlock floor decking.
And this is a view looking through the Living Room area towards the Master Bathroom and Closet.
The beams will be installed Monday and then the roof goes up. Then it will really start looking like a house.
Monday, November 2, 2009
No Progress
The first floor deck has been complete for three weeks now, but that’s it for work on site. The Porta Potty’s been there almost four weeks and has seen about 1.5 days use. I’ve had these kinds of problems before with subcontractors during busy times, but didn’t expect this now. I was just about ready to find another framer – except that now things are scheduled to start up again first thing Wednesday. The first floor walls will go up and then the 4x10 beams and wooden deck will arrive Friday morning and should go right into place. The windows will be ready on Monday, November 9 but will have to wait at the lumber yard until the framing is finished. I had fully expected we would have a weather-tight shell this week, ready for window installation on Monday.
In the meantime, the custom cupola is done and ready to go and we’ve commissioned a weathervane. Acadia Weathervanes has a very reasonably priced turtle weathervane, but when I superimposed it on my drawing of the house, it looked a little small. They will make a custom weathervane for me and increase the size of the turtle by about 50%. That should be ready in about two weeks.
In the meantime, the custom cupola is done and ready to go and we’ve commissioned a weathervane. Acadia Weathervanes has a very reasonably priced turtle weathervane, but when I superimposed it on my drawing of the house, it looked a little small. They will make a custom weathervane for me and increase the size of the turtle by about 50%. That should be ready in about two weeks.
Monday, October 26, 2009
Progress?
The first floor deck was framed almost two weeks ago and the walls were to start this week – but will be delayed until next week. The windows come in on November 9 and I thought they would be the critical item. Now it looks like the windows may be ready before the framer is.
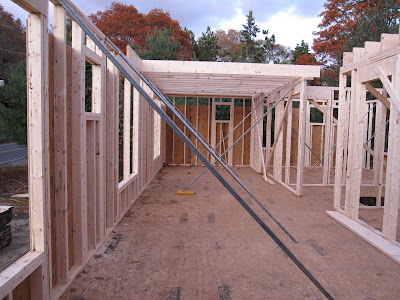
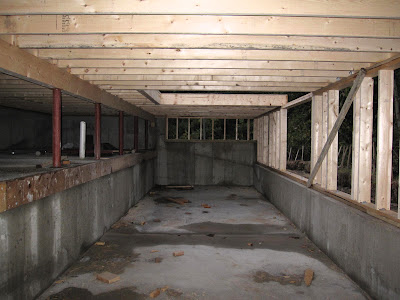
Here's a photo of the Basement.
The plastic pipe is the passive radon vent. There is perforated pipe under the slab laid in a bed of stone. This pipe will be extended through the roof to vent radon if there is any. Only half of the basement is full height and the rest is partial height. Because space on the lot is so tight, the septic system is less than twenty feet from the house. Any part of the basement within 20’ has to be higher than the septic system. We’ll put the furnace in the higher part, leaving most of the full-height basement available.
We had planned on having the septic system installed prior to framing, but the framer was concerned with access around the septic, which changed our sequence. Once the framing is complete, the septic system will be installed and then the stone walls and steps will go in. We had hoped the stone work would be done in September or October rather than November.
Here's a photo of the Basement.
We had planned on having the septic system installed prior to framing, but the framer was concerned with access around the septic, which changed our sequence. Once the framing is complete, the septic system will be installed and then the stone walls and steps will go in. We had hoped the stone work would be done in September or October rather than November.
Tuesday, October 20, 2009
LEED for Homes
Many people know of the LEED program and its general goals, but the specifics can be rather involved. The requirements vary by building type and change over time.
This is just a very brief introduction and overview of the LEED for Homes rating system, which encourages the construction of homes that use less energy, water and natural resources, create less waste, and are more durable and comfortable. It is a quite comprehensive program and much more information is available on the U. S. Green Building Council website.
The rating system measures performance in the following eight categories.
Innovation and Design Process (ID)
Includes comprehensive project planning, orientation for solar design, durability planning and also covers innovative measures not currently addressed elsewhere.
Location and Linkages (LL)
Encourages the construction of homes near existing services, facilities and transportation.
Sustainable Sites (SS)
Promotes minimization of the impact of construction on the site, proper surface water management and erosion control, and the use of compact development.
Water Efficiency (WE)
Encourages efficient water usage both indoors and outdoors and the reuse of water where possible.
Energy and Atmosphere (EA)
Advocates improved energy efficiency with better building envelope design and more efficient heating and cooling systems, energy efficient lighting and appliances, and encourages the use of renewable energy.
Materials and Resources (MR)
Promotes the efficient use of materials, reduced construction waste, and the use of environmentally preferable products and the recycling of construction materials.
Indoor Environmental Quality (EQ)
Strives for improved indoor air quality with the use of controlled ventilation, moisture control and airborne contamination control.
Awareness and Education (AE)
Includes provisions for education of the homeowner (in this case, me) about the operation and maintenance features of the home along with the promotion of public awareness.
The LEED for Homes rating system provides for up to 136 potential points leading to a LEED rating of Certified, Silver, Gold or Platinum.
Wednesday, October 14, 2009
Flooring Choices
Although it seems a little early to have to make flooring choices, some of this makes a difference when framing the house. The mill where we’re getting the beams, Great Brook Lumber, also makes flooring from local lumber including red oak, white oak, maple, ash, birch, pine and cherry. The oak, ash and maple are generally the hardest and some of the others are relatively soft. Flooring hardness is measured by the Janka Hardness Test.
We still have one Dalmatian, Gromit, who can scratch wood floors in his day-to-day activities, so hardness and scratch resistance are important. Oak is probably the best choice, although it is very common and we would prefer something a little more unique. Since we are participating in the LEED for Homes program, reclaimed, recycled or locally obtained woods are preferable, and flooring like bamboo, cork or linoleum are also encouraged because they are made from readily renewable resources. We have considered bamboo, but are not overwhelmed by the look.
This curly red maple flooring from Hull Forest Products is really beautiful, but it is a relatively soft maple and we'd have to walk around in our stocking feet and sell the dog to keep it from getting scratched up.
The wood we are most seriously considering is mesquite. It is almost twice as hard as oak and is very stable. Because it is so hard, it generally comes in a 1/2" thickness rather than 3/4". It is also a very attractive wood. The trees grow in gnarled shapes, giving interesting grain patterns. The mesquite from Faifer & Company comes from reclaimed logs. We would probably stain it to take on a reddish mahogany color to resemble some of the tropical hardwoods, but would not need to disturb any rainforests in the process.
We are considering real linoleum upstairs. People have adopted the term linoleum to mean almost any resilient sheet flooring, but real linoleum can be quite nice. It is long-wearing and very durable. Forbo calls theirs Marmoleum. It does require a different floor preparation than wood flooring, though. The linoleum would cost less than wood flooring, but it is not inexpensive.
We have decided that the majority of the First Floor will have wood flooring. The Second Floor could be wood or linoleum. Since the second floor framing is partly conventional wood joists and plywood and partially wood beams and 2” nominal wood deck, there are potentially two different floor surface materials. If we decided to go with a wood finish flooring, I would have the beams and 2” wood deck installed a little low so that the wood deck could be covered with the same plywood subfloor that covers the conventional joist framing. If we decided to use linoleum, the plywood subfloor and 2” wood deck should be level and would be covered with a smooth plywood underlayment, which would be installed after plastering is complete. That is why we need to decide now.
Saturday, October 10, 2009
October 10, 2009 - All Caught Up
I started this blog about 2 ½ weeks ago and had four plus months of progress to cover. I’ve caught up and things are in real time now.
The stone veneer on the front of the foundation is complete and Don Pires of Pires Construction, the framing contractor started yesterday. Although there is concrete showing now, the porch and deck will cover the concrete on the right side and, once the grade is raised, it will look like a stone foundation.
The stone veneer on the front of the foundation is complete and Don Pires of Pires Construction, the framing contractor started yesterday. Although there is concrete showing now, the porch and deck will cover the concrete on the right side and, once the grade is raised, it will look like a stone foundation.
Friday, October 9, 2009
Stone Choices
Although our site originally was designed with a timber landscape tie retaining wall around the septic system, a stone wall is really much more in character with the area and just looks more natural. Our son Brian Lewis will be doing this work and this is his company, The Natural Landscape. We will also have five stone steps coming up from the driveway.
We went out to Goshen, MA and looked at Goshen Stone. The stone, stair treads and walkway pavers in this photo are all Goshen Stone.
I like traditional Natural Fieldstone.
But on Cape Cod, especially in the Centerville and Osterville area, New England Round Fieldstone, also called Cape Cod Stone, is most prevalent.
![]()
This tower is an example of that stone.
By the way, this house is currently for sale and the tower comes with it at no additional charge. In the end, we decided on a stone having a similar shape to the Round Fieldstone, except that these are actually leftovers from the screening of loam.
They are similar in shape, but have a greater variety of sizes and a color that I prefer a little more. The Round Fieldstone you see on Cape Cod often takes on a kind of yellowish coloration, and this should have more of a stone grey color.
We went out to Goshen, MA and looked at Goshen Stone. The stone, stair treads and walkway pavers in this photo are all Goshen Stone.
I like traditional Natural Fieldstone.
But on Cape Cod, especially in the Centerville and Osterville area, New England Round Fieldstone, also called Cape Cod Stone, is most prevalent.
This tower is an example of that stone.
By the way, this house is currently for sale and the tower comes with it at no additional charge. In the end, we decided on a stone having a similar shape to the Round Fieldstone, except that these are actually leftovers from the screening of loam.
They are similar in shape, but have a greater variety of sizes and a color that I prefer a little more. The Round Fieldstone you see on Cape Cod often takes on a kind of yellowish coloration, and this should have more of a stone grey color.
And the Color is - Shark Whiskers
It was almost a foregone conclusion that we would use fiber cement clapboard siding. It is a very durable material and is a good substitute for wood. I prefer the Certainteed fiber cement siding over the more common HardiePanel because Certainteed has a more realistic woodgrain pattern. I built a house with it and most people didn’t realize it wasn’t wood. To me, the HardiePanel looks a little more like Vac-U-Formed wood. Even from a distance I can tell if it’s Hardie because of the grain pattern.
Each siding manufacturer has a range of colors in their pre-finished product and also provides a paint warranty. We took samples of the siding and viewed them in different conditions and couldn’t find just the right color. Most people pick a color and are done with it. Not us. I called the local Certainteed rep and he said they do custom colors using PPG paint. In fact, there is a 25 year paint warranty from PPG as compared to a 15 year warranty from Certainteed on their pre-finished siding.
Now we just had to find a color. The ubiquitous color in the heart of Centerville is white, but that’s a little too plain. We wanted a light grey-beige kind of a color - but not too grey and not too beige. We picked up some PPG color chips and found a grey-beige color that we liked, but the Whiskers color was too light and the Sharkskin color was too dark, and there was nothing in between. We had a new color mixed which is somewhere between these two colors, so I guess it should be called Shark Whiskers.
Wednesday, October 7, 2009
To LEED or not to LEED
We will definitely participate in the Energy Star program, but participation in the LEED (Leadership in Energy and Environmental Design) for Homes program was a more complicated decision. The Energy Star program provides cash rebates for building efficiently. I am willing to spend a little more now to save money down the road even without rebates, and when the government is willing to give me money for doing so, all the better.
LEED for Homes, though, is a much more complex and rigorous process, some of which is similar to the Energy Star program but the LEED program addresses many more issues. Administered by the U.S. Green Building Council, LEED for Homes goes far beyond just energy efficiency. It encourages the smarter use of resources and the construction of a more durable and healthier home. There are fees to be paid and consultants to be hired, and the process will take a fair amount of time for research and documentation. The program will coerce us into considering many factors that we may have otherwise overlooked and, in the end, a third-party will certify that we have met their Green Building Rating System.
'USGBC' and related logo is a trademark owned by the U.S. Green Building Council and is used by permission
Tuesday, October 6, 2009
Cinnamon Toast
Because we are within one mile of the coast, the new building code requires impact resistant windows. Another option is to have plywood panels cut to size, ready to be installed in case of a major storm. The thought of worrying about when to have the plywood put up, how to have it put up if we’re not there, and what a plywood encased house would be like during a storm led us to go with the more expensive impact resistant windows.
Andersen windows are probably the most common major window brand, especially on Cape Cod. We have them in our current house and have been happy with them. Their impact windows, though, require extra levers and blocks to make them impact resistant, resulting in a less attractive window. A vinyl window, like those made by Harvey Industries, would probably be the cheapest option, but vinyl windows typically just don’t look as good. The glass is often set in front of the building plane which just doesn’t look right and the ‘welded’ corners are a little sloppy. There is a Pella store right in Centerville and they were a strong contender. We also looked at windows from Marvin, Kolbe & Kolbe, Weathershield and others. In the end we decided on Eagle Windows. They are a beefier window and, because of that, are good candidates for impact windows without the need for extra blocks and levers. They are a wood window with a heavy aluminum cladding and are a little less expensive than most of the others. I had used some of their larger sizes in several schools. Andersen recently bought the company, which means they will probably become more prevalent.
I had always anticipated having white windows, which is very typical on Cape Cod. Eagle offers fifty standard colors at no additional charge, and the idea of a colored sash is interesting. They probably don’t get much call for at least two-thirds of their colors, though. Some of them are rather jarring. The color decision wasn’t easy. We had them send us some actual samples on aluminum, but weren’t quite sure of the right color. I decided to try a window mock-up. I bought some four pane picture frames to simulate the window sash, and Sherwin Williams stores have the paint formulas for Eagle colors. Eagle has a deep red color that could be very interesting, but you don’t want to have the windows installed and then find that the color’s not right. I painted the picture frame and put it against one of our windows and, it works. Eagle’s ‘Cinnamon Toast’ color looks sharp.
Sunday, October 4, 2009
September 8, 2009 - The Foundation
The foundation was poured the previous week and our first view of it was on the 8th. The ledge on the front is for a stone veneer, which will match the stone wall out front.
We made reservations at the Centerville Corners Inn, just down the street from our property, for the tail end of the Labor Day weekend. The first night we paid the summer season price, but the second night was at their fall price, which is just over one-half the summer rate. That’s typical for Cape Cod. We spent most of our time looking at things like stone, lighting, plumbing and cabinets and even spent a little time at the beach.
We also put up the new and improved sign.
We also put up the new and improved sign.
September 1, 2009 - Beamed Ceilings
Although I had designed the house with typical floor joists and gypsum board ceilings, it seemed appropriate to have real wood beamed ceilings. I could build the house conventionally and then add decorative beams and wood ceiling, but real exposed beam ceilings are the right way to do it. Conventional floor joists, though, conceal all kinds of wires, plumbing and ductwork and are much easier to deal with. The best compromise is to build some of the floors conventionally framed and others beamed. We would like at least the Foyer, Living Room and Dining Room, and possibly the Master Bedroom, to have beamed ceilings. There is plumbing above the Kitchen, dictating a gypsum board/plaster ceiling. After some analysis of things, I decided to do all of the rooms named above and the hallway with wood beams and deck. This is what the second floor framing plan looks like. The second floor beams and deck form the first floor ceiling. I calculated the decking lengths and amounts so that all of the joints can occur over the beams.
![]() The challenge was then to find the right material for beams and deck. The local lumber yards can get douglas fir beam and southern yellow pine or lodgepole pine decking. These come from far away, don’t have quite the look I would like, and it just seems that there is plenty of wood in New England. After some internet searching, I found a list of Massachusetts sawmills and dry kilns that the State publishes. Then my search began. I was looking for kiln dried lumber since wood can shrink greatly as it dries. My calls started to lumber mills with dry kilns, but beams are seldom kiln dried and kiln drying can be an expensive process. Then I tried the mills nearest the Cape, who typically had rough sawn eastern white pine beams and could not make tongue and groove decking. I was looking for planed beams for a more finished look. I finally settled on hemlock beams and hemlock T&G decking from Great Brook Lumber in Southwick, MA. They had some nice material that had been cut down and left to air dry.
The challenge was then to find the right material for beams and deck. The local lumber yards can get douglas fir beam and southern yellow pine or lodgepole pine decking. These come from far away, don’t have quite the look I would like, and it just seems that there is plenty of wood in New England. After some internet searching, I found a list of Massachusetts sawmills and dry kilns that the State publishes. Then my search began. I was looking for kiln dried lumber since wood can shrink greatly as it dries. My calls started to lumber mills with dry kilns, but beams are seldom kiln dried and kiln drying can be an expensive process. Then I tried the mills nearest the Cape, who typically had rough sawn eastern white pine beams and could not make tongue and groove decking. I was looking for planed beams for a more finished look. I finally settled on hemlock beams and hemlock T&G decking from Great Brook Lumber in Southwick, MA. They had some nice material that had been cut down and left to air dry.
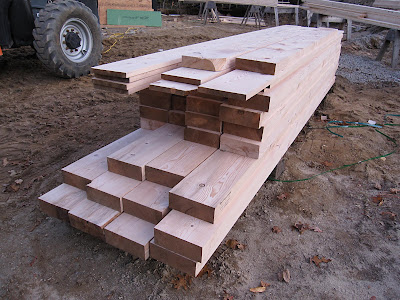
And this is what the pile of lumber looks like. Once ordered, they trim it to nearly the final sizes, sticker it, meaning they put sticks between the boards for further air drying, and then put in under roof. Then, just before it’s needed, they plane it to final size and ship it to the job site.
And this is what the pile of lumber looks like. Once ordered, they trim it to nearly the final sizes, sticker it, meaning they put sticks between the boards for further air drying, and then put in under roof. Then, just before it’s needed, they plane it to final size and ship it to the job site.
Subscribe to:
Posts (Atom)
